
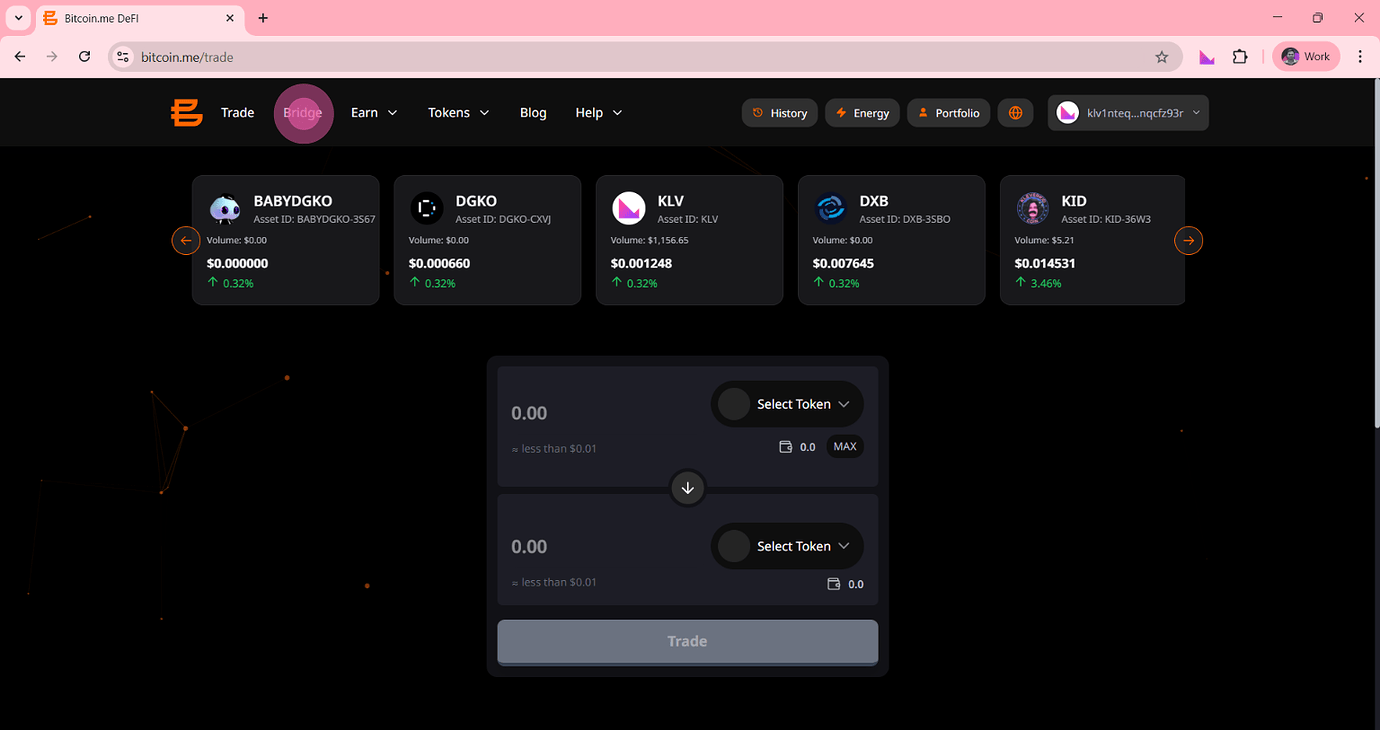
The Bitcoin.me Bridge allows users to move assets between blockchain networks securely and efficiently. Whether you're accessing new DeFi opportunities or managing assets across chains, bridging makes it simple to transfer tokens between ecosystems.
This guide provides a complete step-by-step walkthrough on how to bridge tokens using Bitcoin.me.
Before You Start
Make sure you have:
- A connected wallet (Klever Wallet or compatible wallet)
- Enough balance to cover network fees
- The correct destination address
- A stable internet connection
Step-by-Step Guide: How to Bridge Tokens
Step 1 — Navigate to the Bridge
Go to the Bridge page on Bitcoin.me.
You can either:
- Visit the Bridge directly
- Or click "Bridge" in the top navigation menu
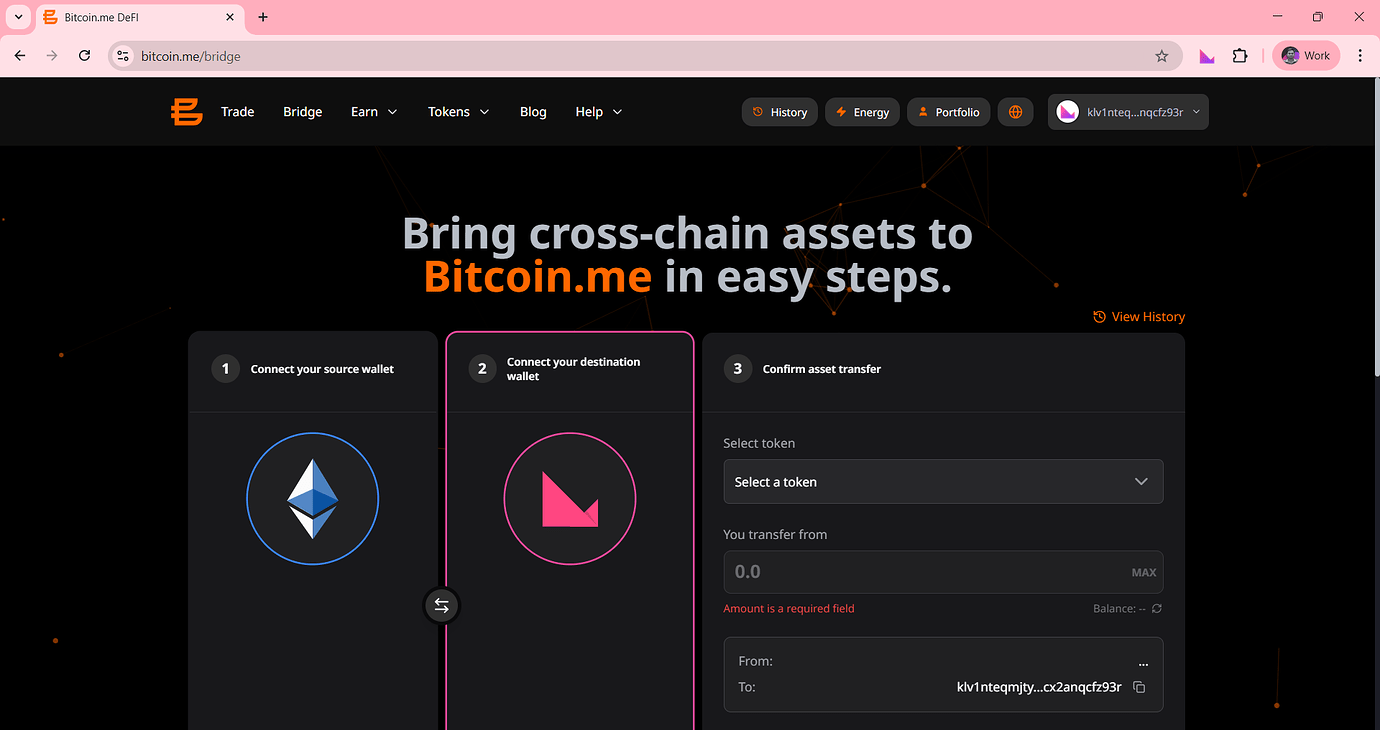
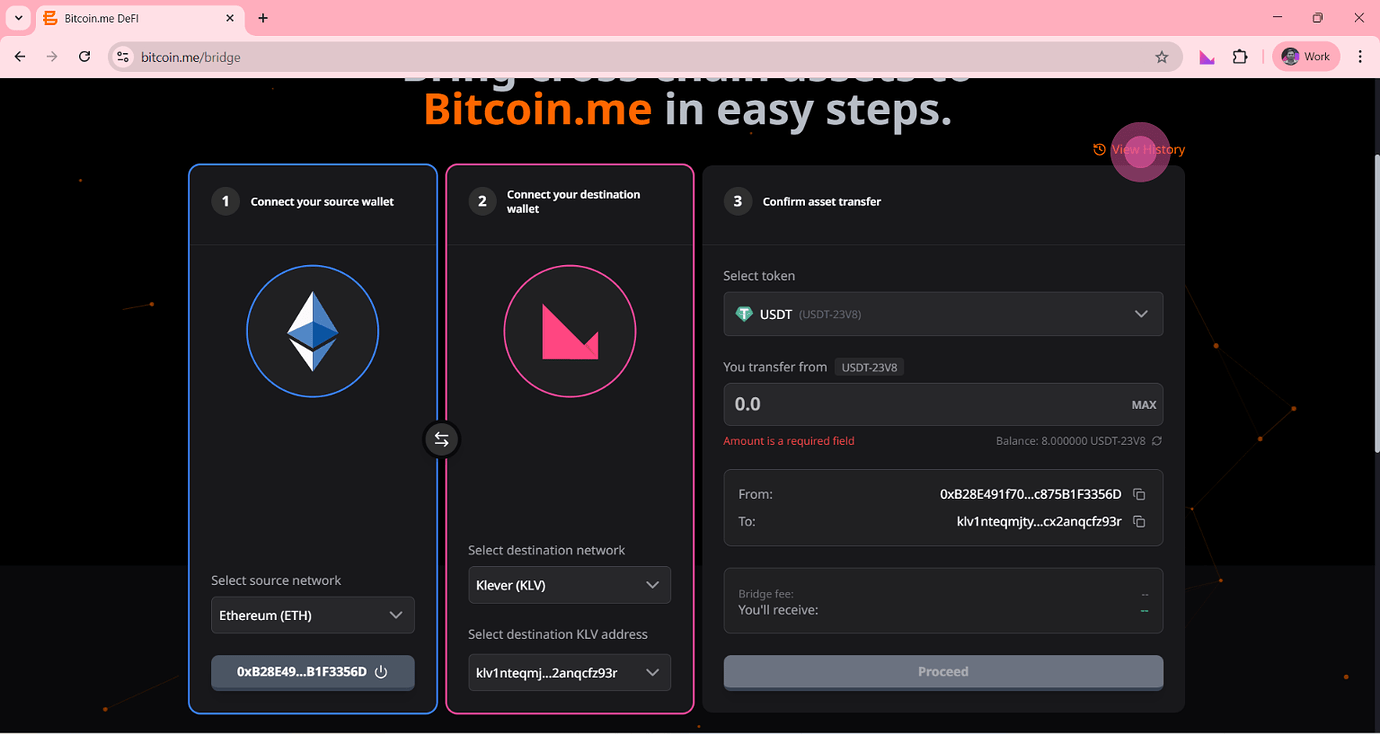
Step 2 — View the Bridge Interface
You will see three main panels:
- Panel 1: Connect your source wallet
- Panel 2: Connect your destination wallet
- Panel 3: Confirm asset transfer
By default, the Bridge shows:
Ethereum → Klever
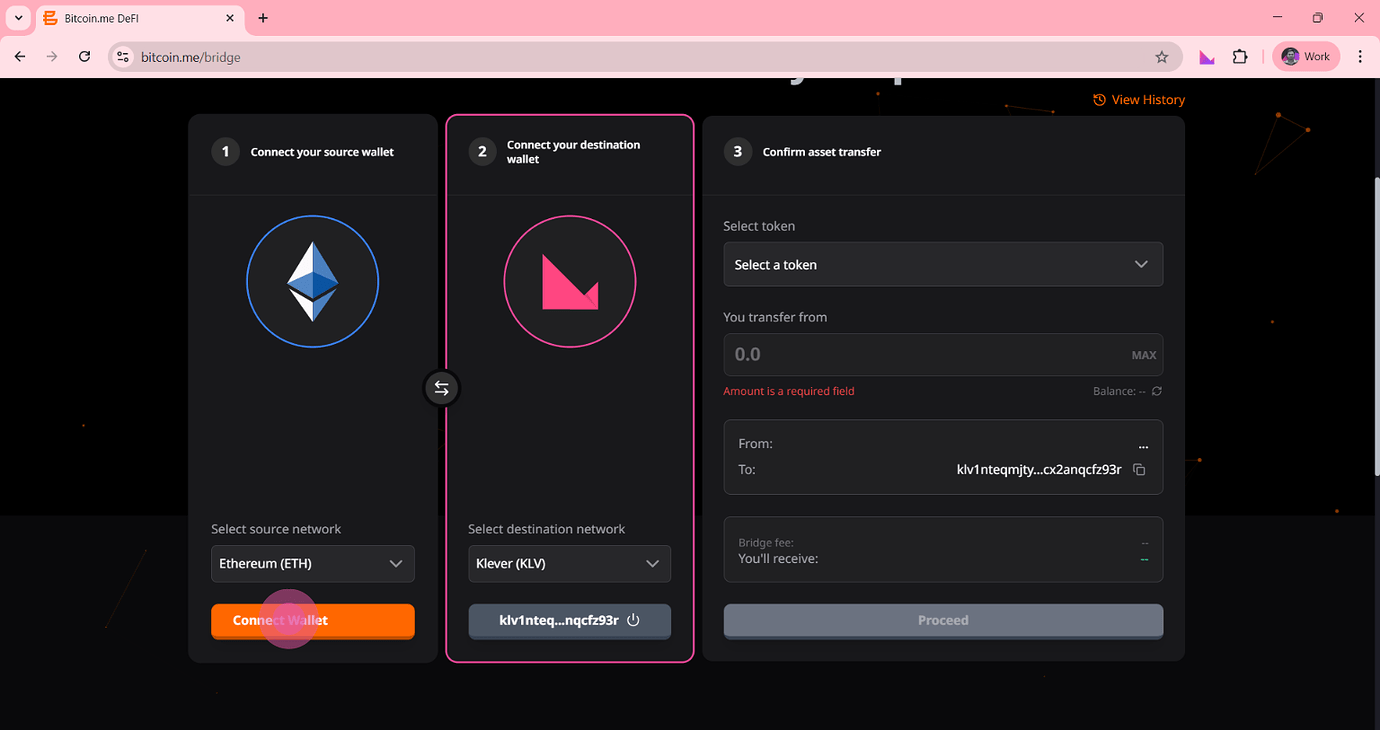
To bridge from Klever to Ethereum:
Click the swap direction (⇄) button between the wallet panels.
Step 3 — Connect Your Source Wallet (Klever Side)
Under:
Select source network
- Choose Klever (KLV)
- Click the orange Connect Wallet button
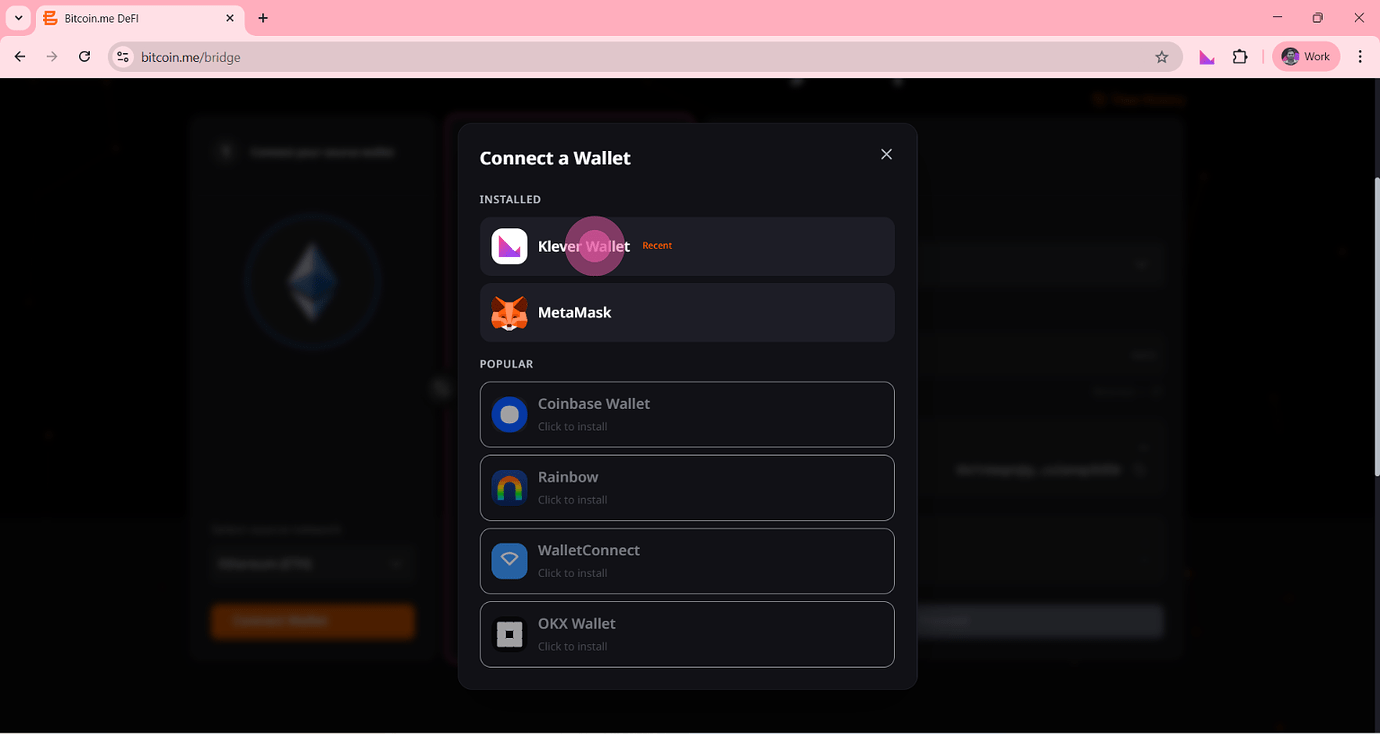
Step 4 — Select Your Wallet
A Connect a Wallet modal will appear.
Under Installed, select:
- Klever Wallet
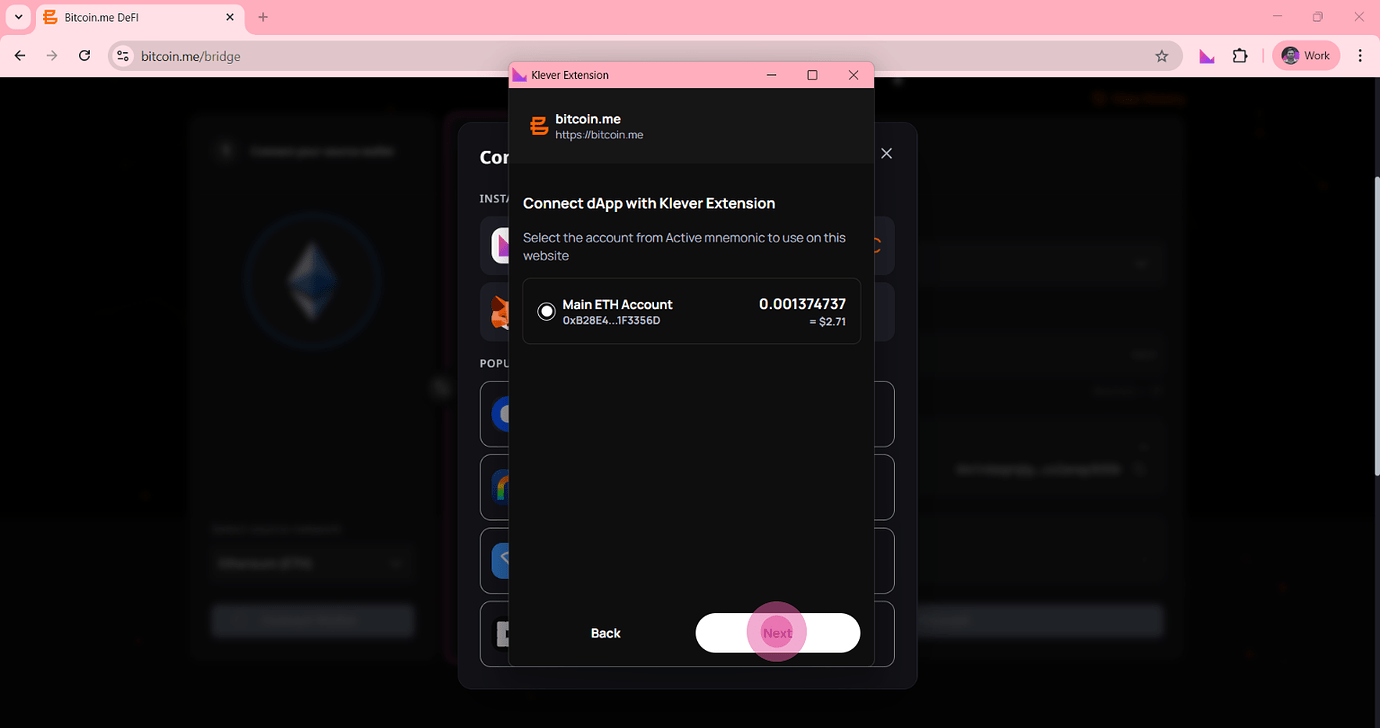
Step 5 — Select Your ETH Account
The Klever Extension popup will open.
- Select your Main ETH account
- Click Next
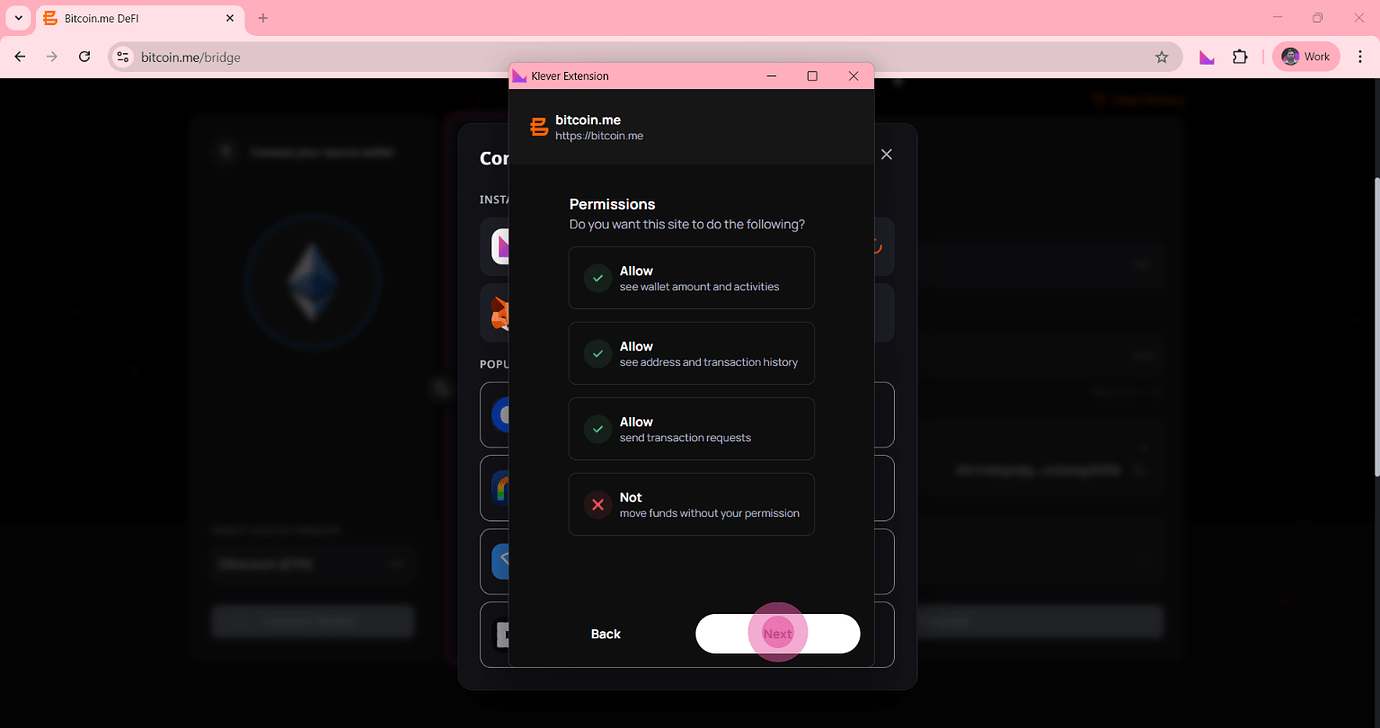
Step 6 — Grant Permissions
Review the permissions requested by the application.
These typically include:
- Viewing wallet balance and activity
- Viewing address and transaction history
- Sending transaction requests
Then:
Click Next to approve.
Step 7 — Wallet Connected Confirmation
A confirmation message will appear indicating:
Wallet Connected
The system will also begin loading the destination wallet address.
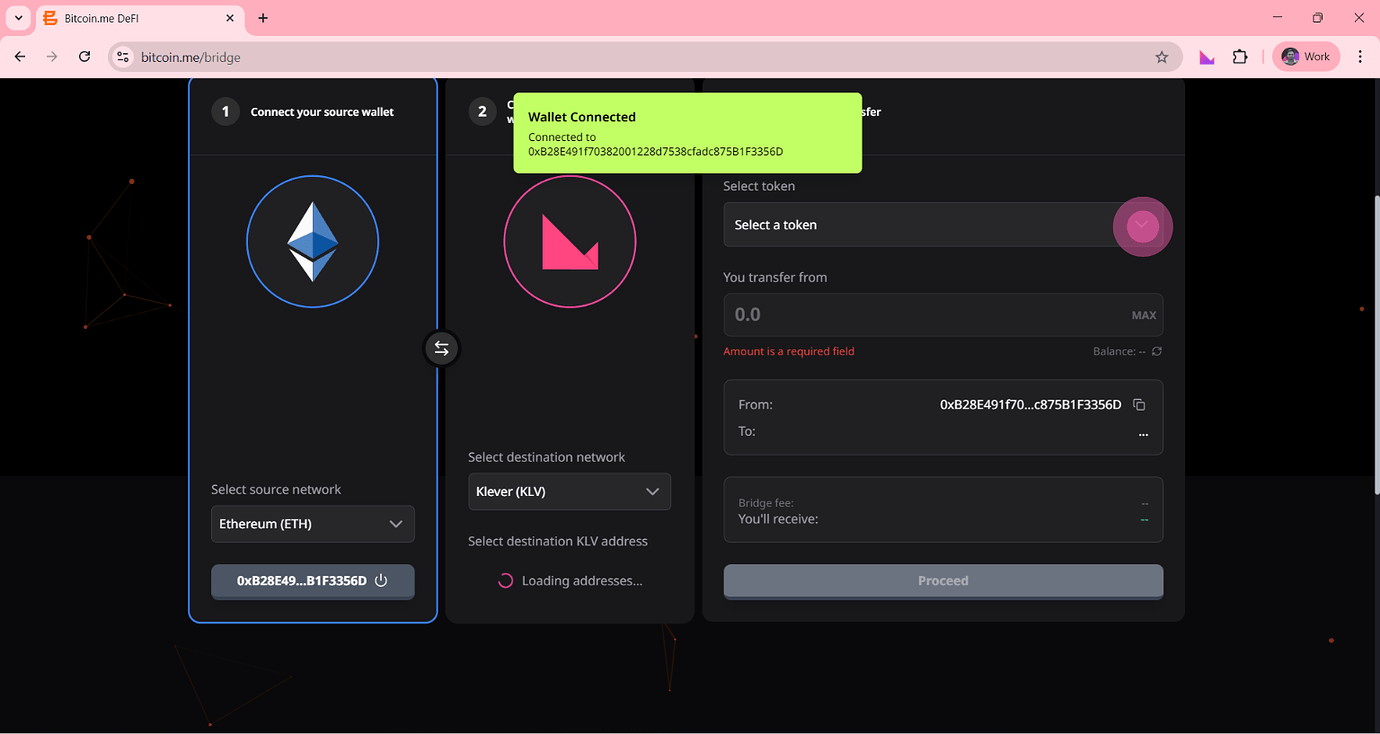
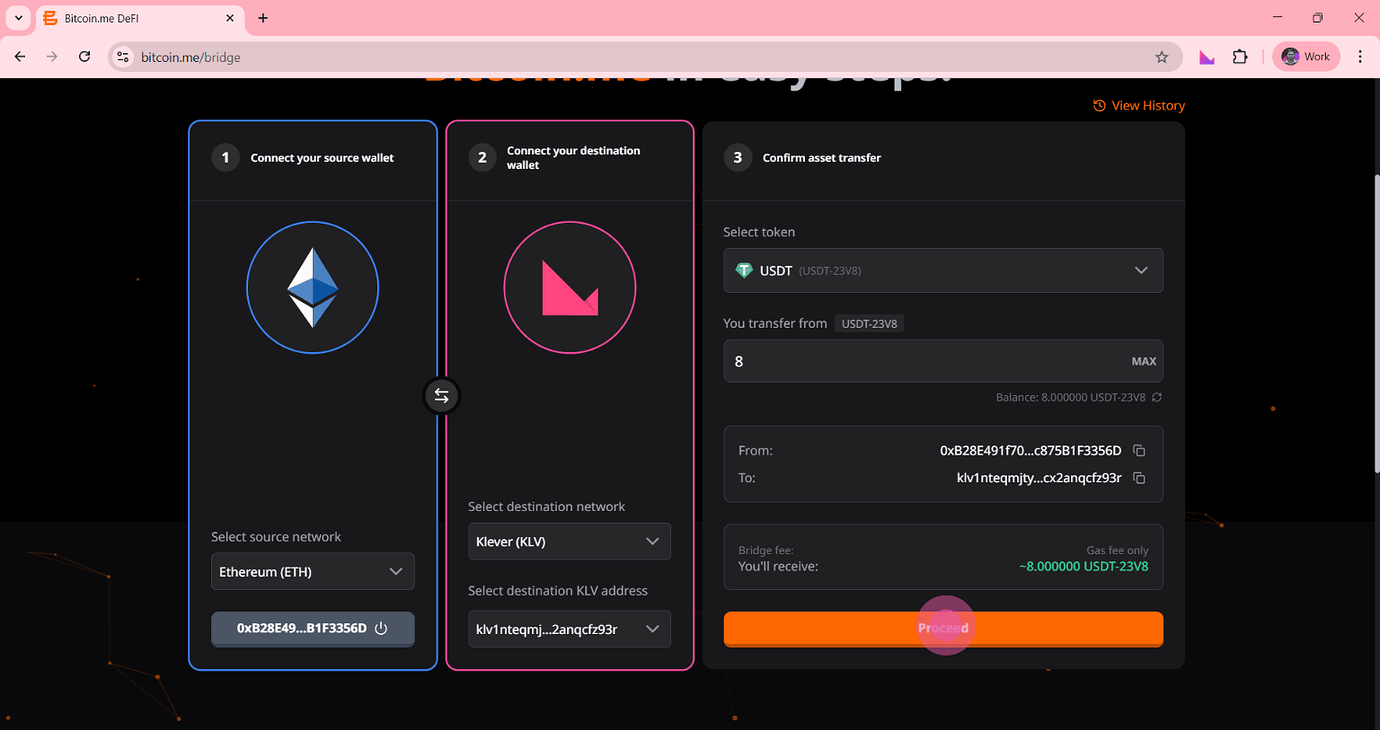
Step 8 — Configure the Transfer
Now complete the transfer details.
Fill in Panel 3:
- Select the token
- Enter the transfer amount
- Confirm sender and recipient addresses
- Review bridge fee information
- Review the estimated amount to receive
Then:
Click Proceed
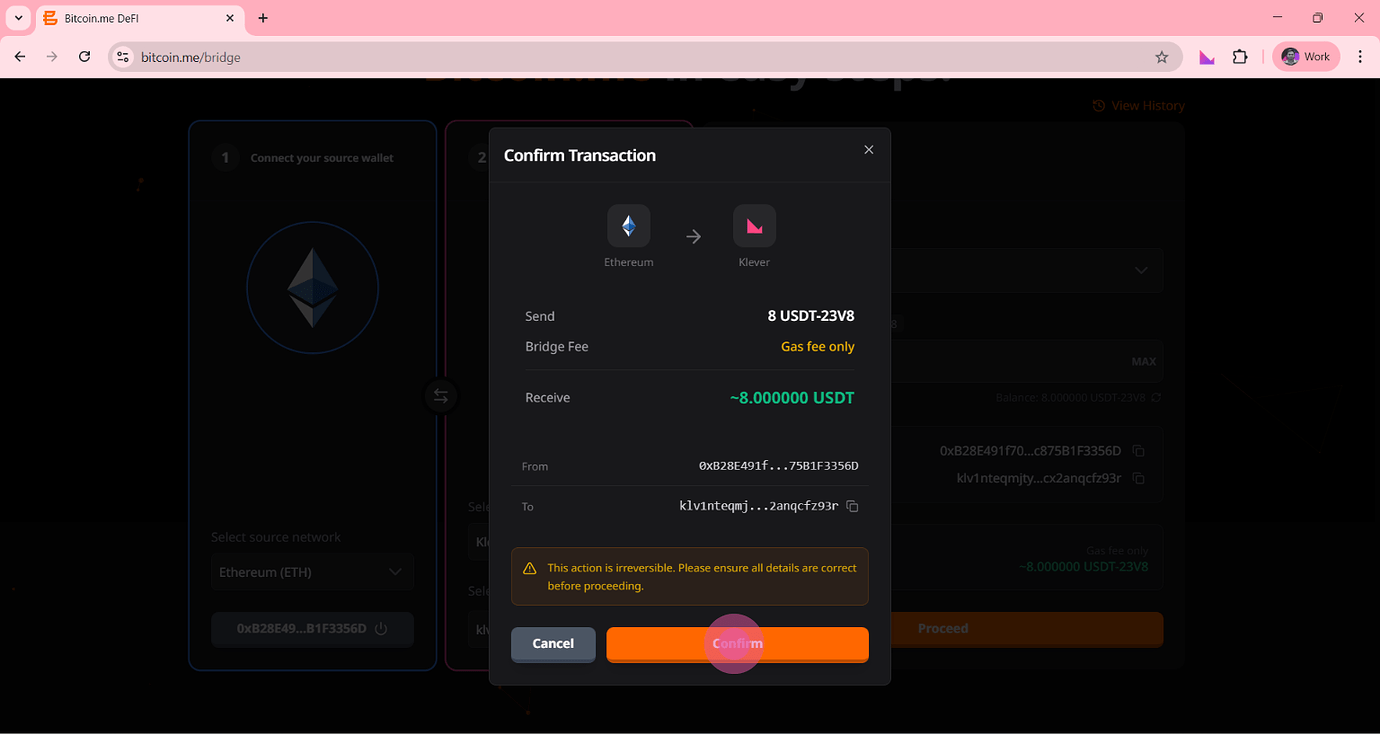
Step 9 — Confirm Transaction Details
A confirmation window will appear showing:
- Amount to send
- Bridge fee
- Amount to receive
- Source address
- Destination address
Carefully review all details.
Then:
Click Confirm
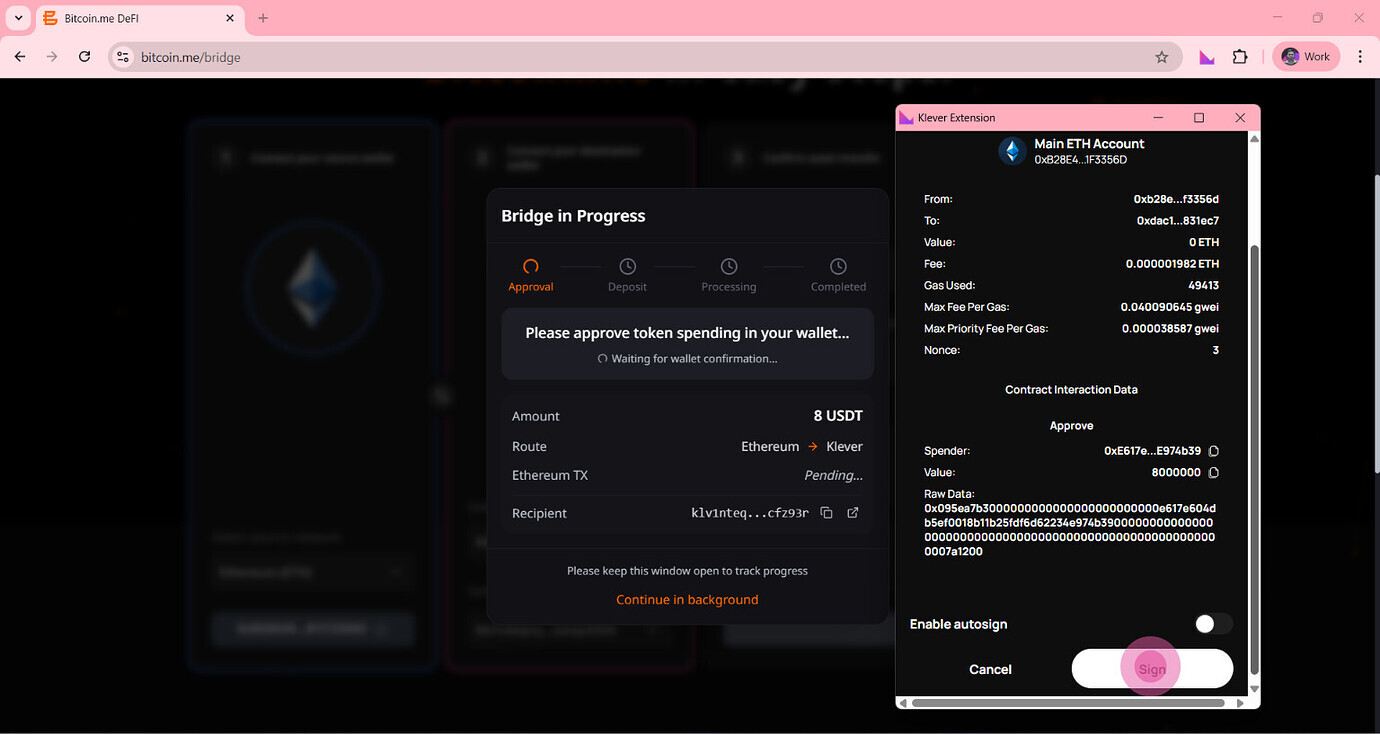
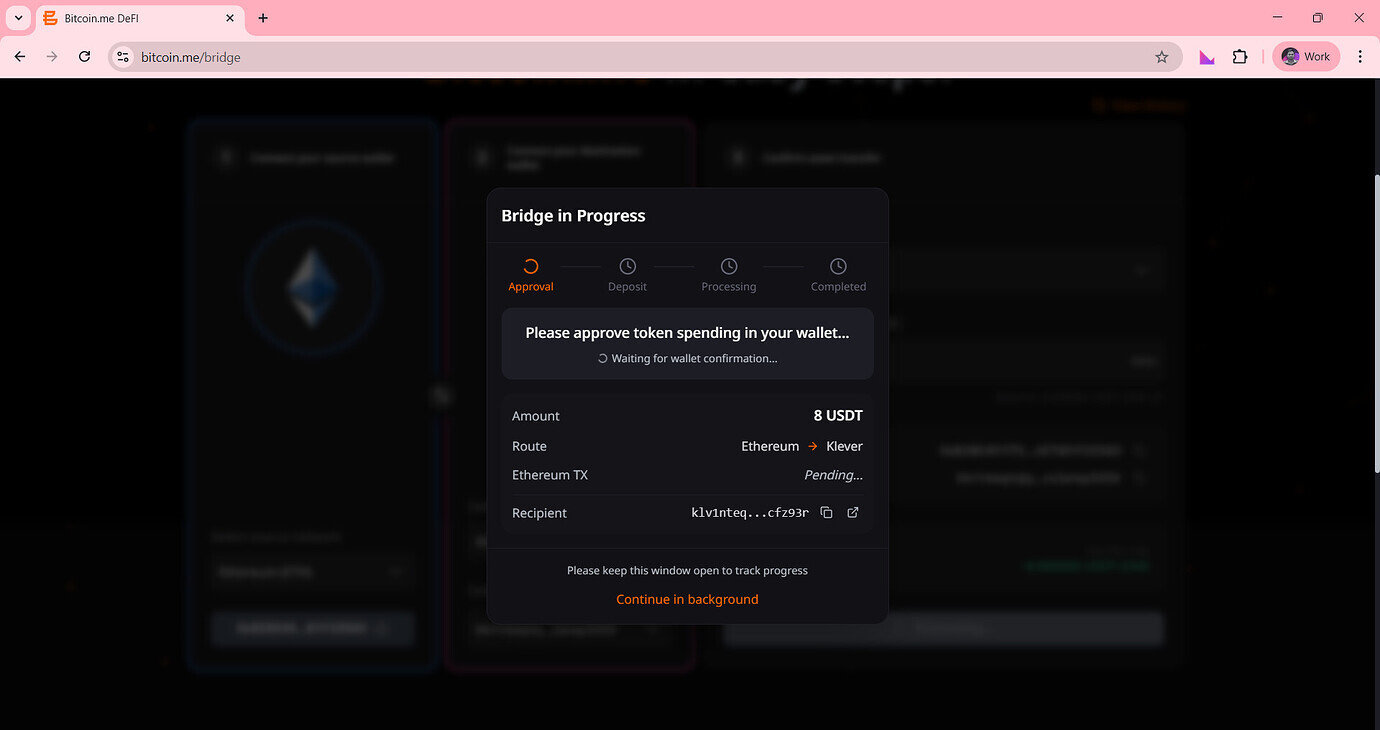
Step 10 — Approve Token Spending (Approval Stage)
The system will enter the approval stage.
A wallet popup will appear requesting authorization to spend the selected token.
Review the transaction details.
Then:
Click Sign
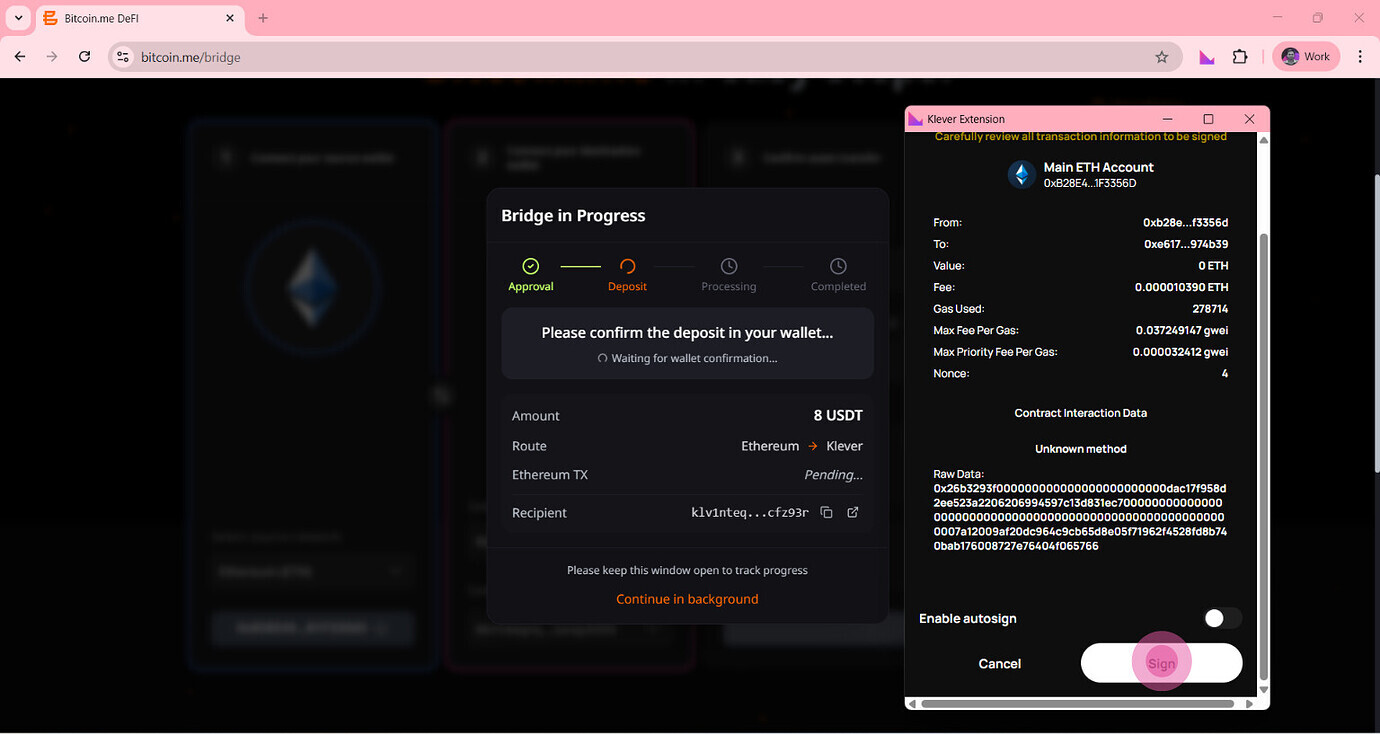
Step 11 — Confirm the Deposit (Deposit Stage)
After approval, the system will request confirmation of the deposit.
A new wallet popup will appear.
Then:
Click Sign again to confirm the deposit.
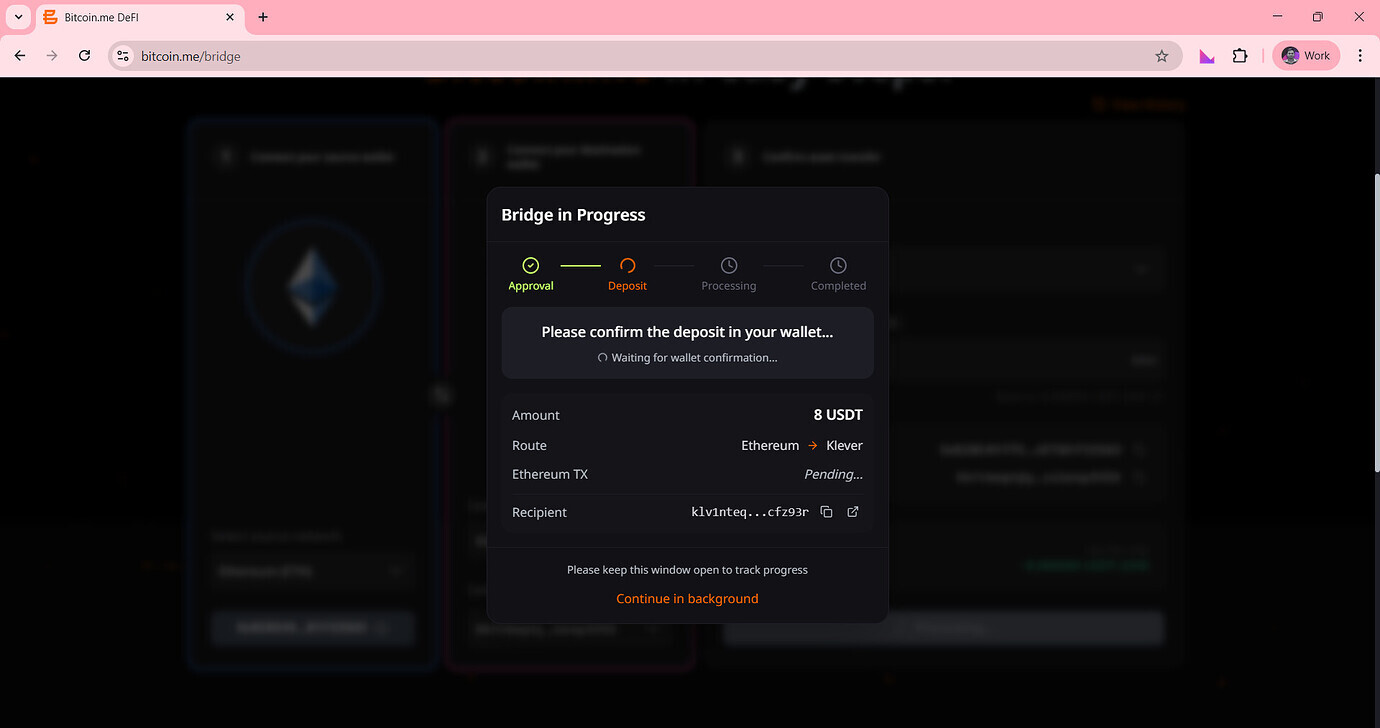
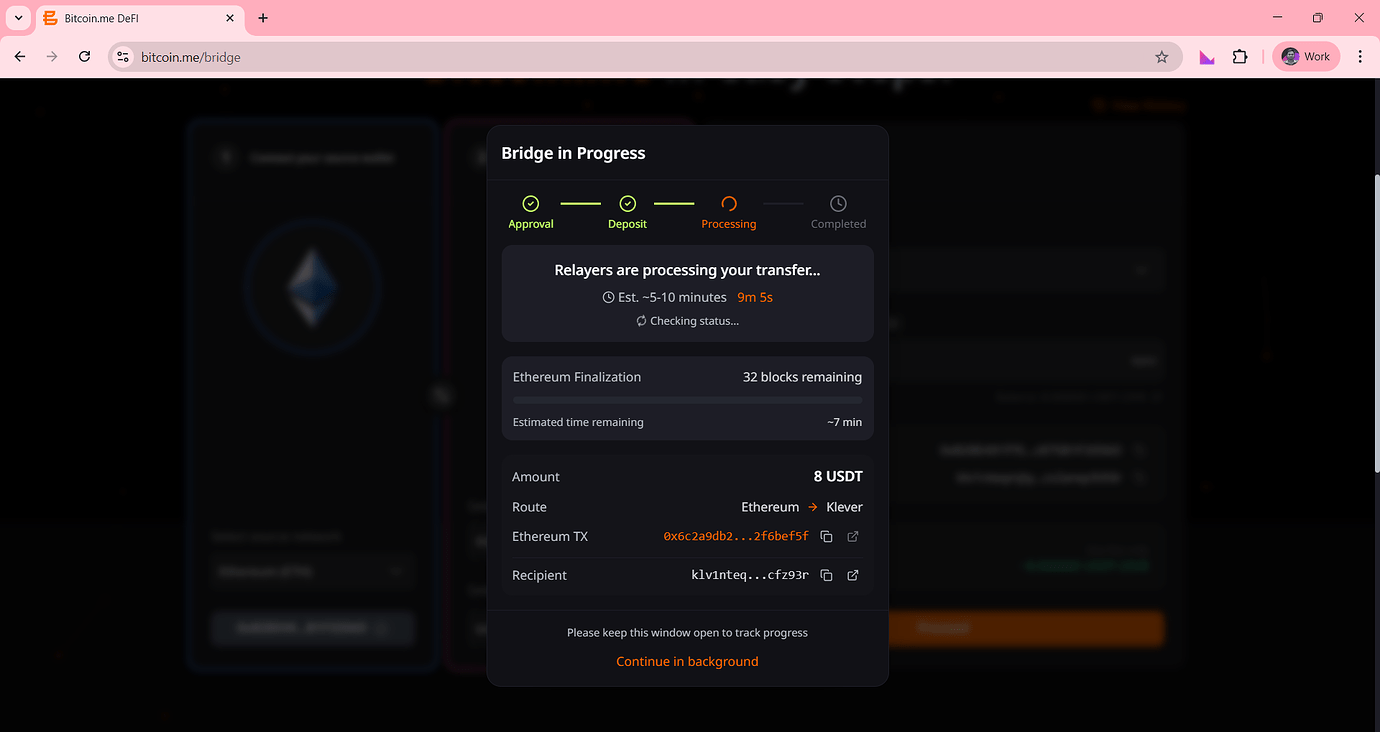
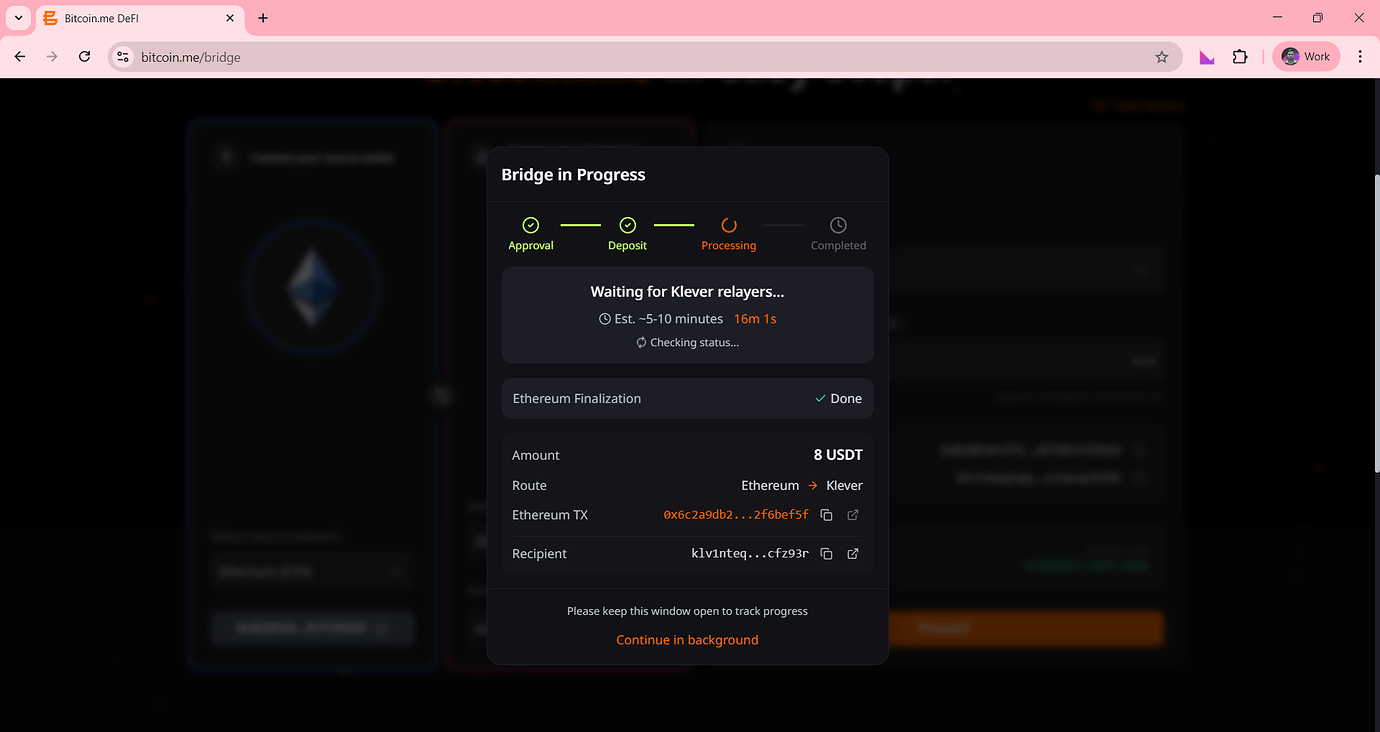
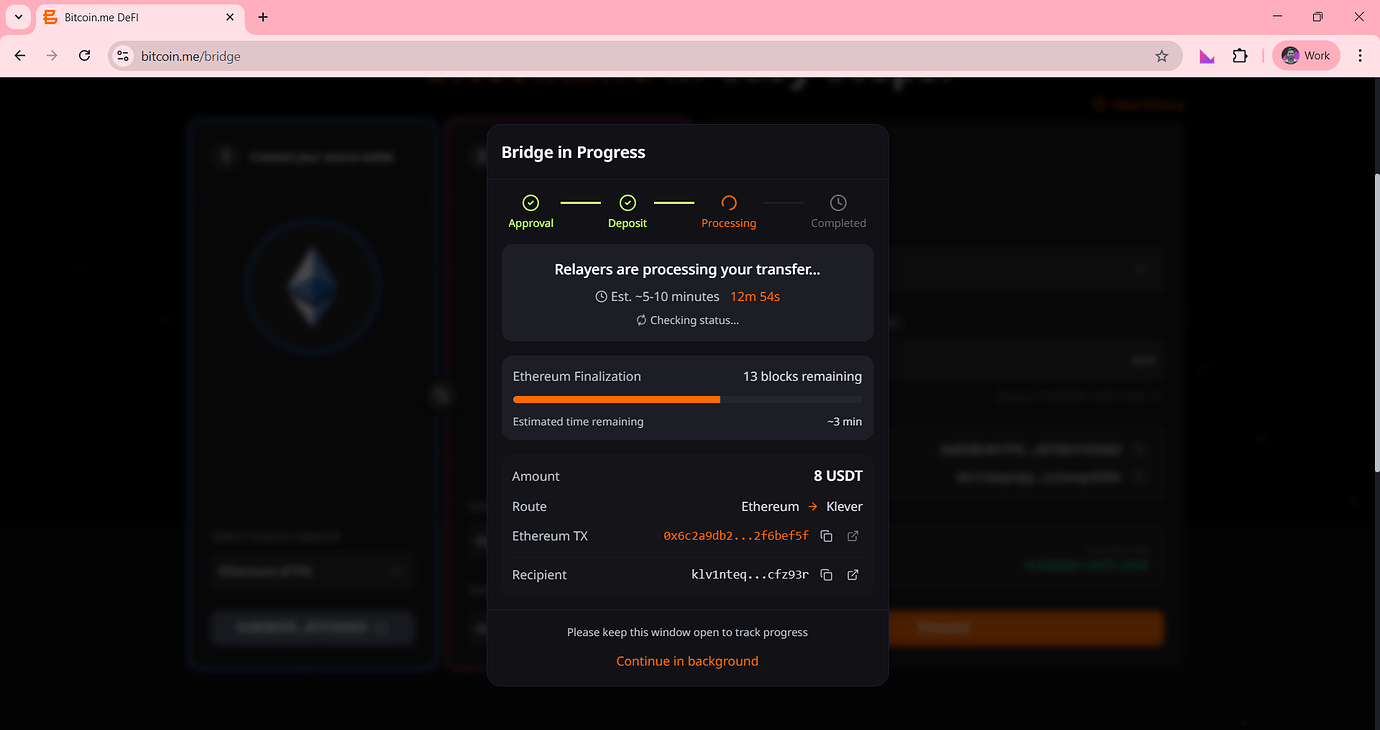
Step 12 — Processing Stage
The bridge will begin processing the transfer.
During this stage, you may see:
- Transfer progress indicators
- Network confirmations
- Estimated processing time
You can continue using the platform while the transaction completes.
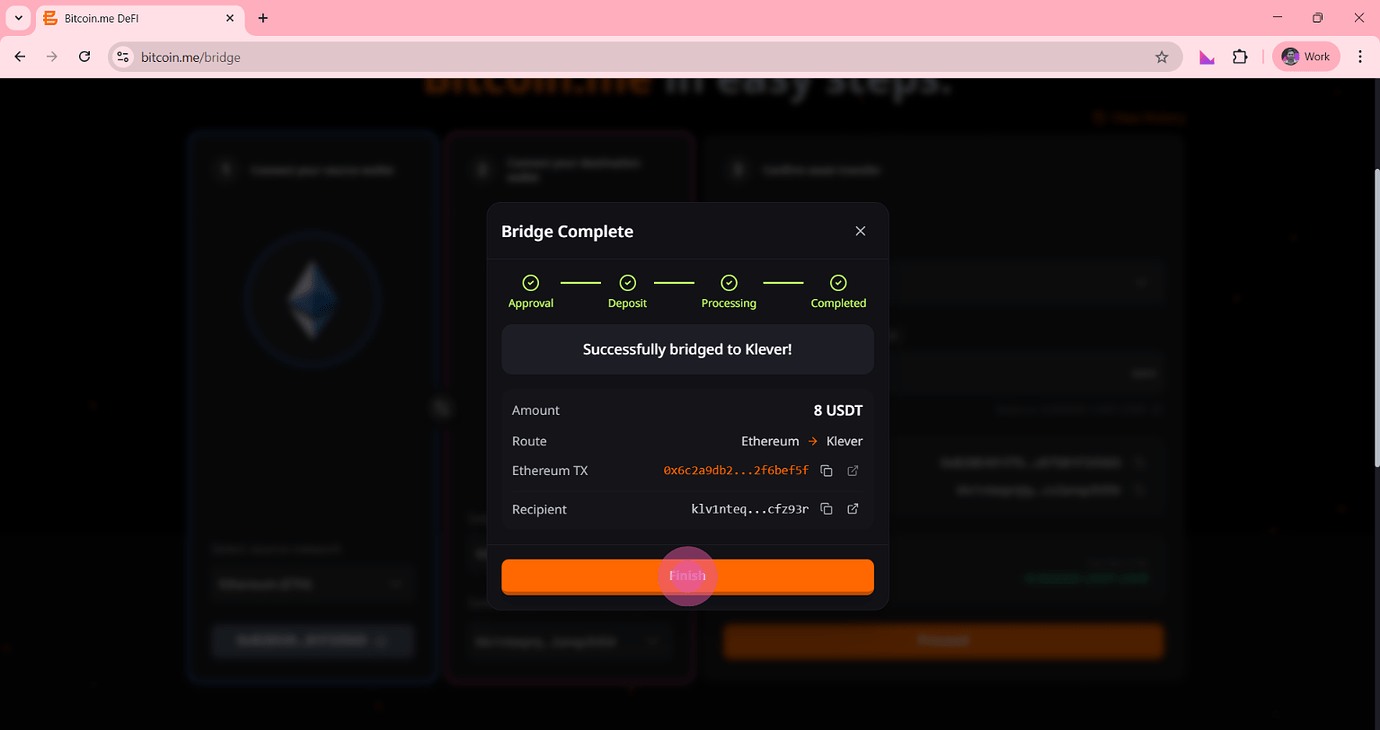
Step 13 — Bridge Complete
Once all stages are completed successfully, you will see a confirmation message.
The system will display:
- Transfer amount
- Route
- Transaction hash
- Recipient address
Then:
Click Finish
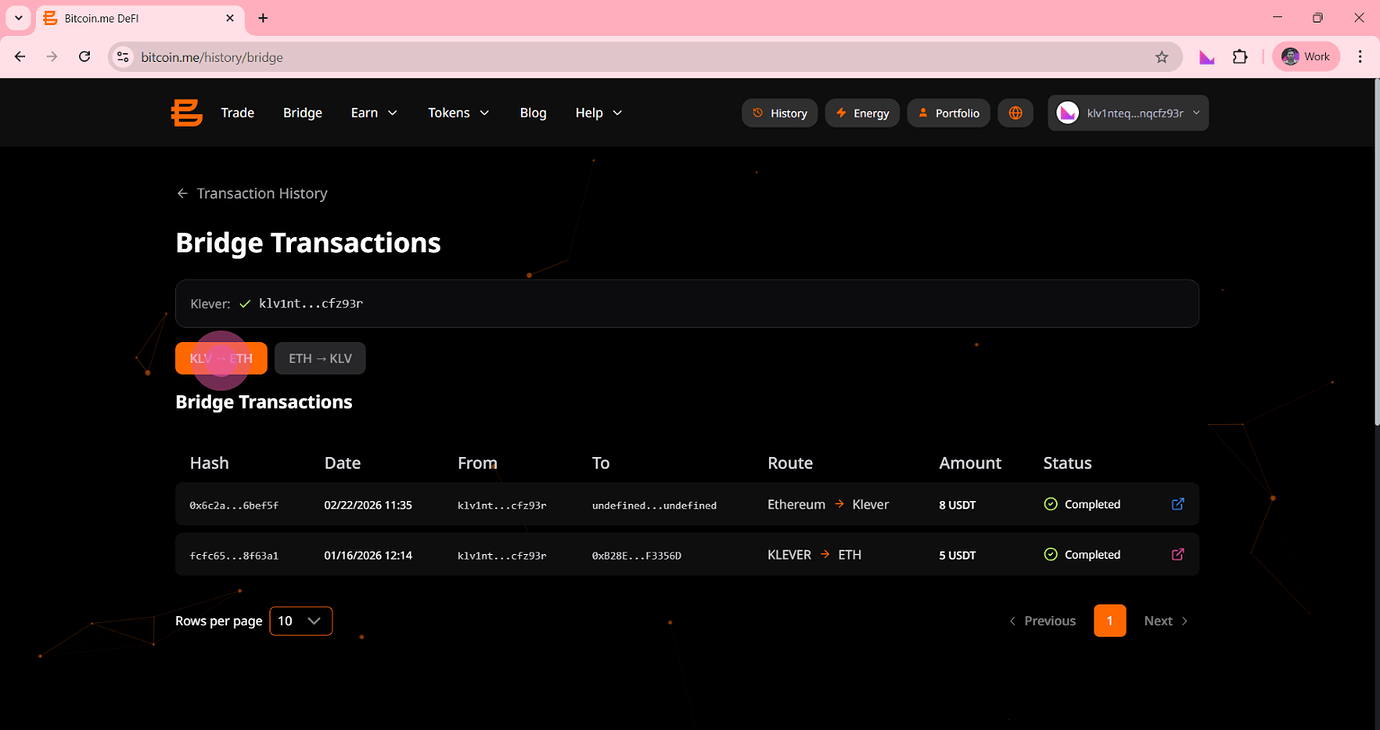
Step 14 — View Transaction History
After completing the transfer:
Click View History to see your Bridge transactions.
You will be able to:
- View completed transfers
- Check transaction status
- Review transfer details
Final Note
Bridging assets between networks expands your access to liquidity, trading opportunities, and decentralized applications across ecosystems.
The Bitcoin.me Bridge provides a secure and user-friendly way to manage assets across chains — while maintaining full control of your funds.
